"Have You Considered
Concrete Resurfacing
For Your Garage Floor?"

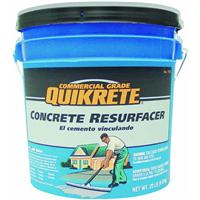
Concrete resurfacing is a great way to renew the look and serviceability of your concrete garage floor. Quikrete® Cement and Concrete Products offers a fantastic product for this purpose called Quikrete® Concrete Resurfacer. It is available in 40 pound bags (for use with a cement mixer), or in some locales, 5 gallon pales.
This product consists of a blend of portland cement, sand, polymer modifiers and additional additives. It is designed to perform as a shrinkage compensated concrete repair material for effecting a thin resurfacing to sound concrete in need of surface restoration or renewal. The product, when cured, will provide a durable wear resistant surface that will easily withstand heavy foot traffic and vehicle traffic. It is a very economical product designed as an alternative to removing existing spalled and flaking concrete floors. Read our page in this section titled: Concrete Restoration for products and techniques related to spalling and flaking. This product can be trowel, brush or squeegee applied.
Editor's Note: If you plan to use this product over an original concrete garage floor that is undamaged and un-cracked, you will need to follow the manufacturers instructions concerning prepping the surface with either a acid-etch agent or high-pressure power washing in order to effect any type of bond between the two surfaces. Grinding the floor with 60 grit using a 32" diameter grinder will also work to effect a proper cut in the original surface.
Application

Once you have your existing concrete floor surface prepped and ready for resurfacing, the application is fairly straight forward and simple. You will want to section-off your work to floor areas that are no larger than 144 square feet (12' x 12'). It is essential that control joints and/or expansion-contraction joints be maintained. You can use styrofoam backer-rod to stuff into the joints or even duct tape to keep the concrete resurfacer product from spilling into the joints.

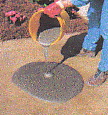
Saturate the work surface area with water from a garden hose and then remove the excess with a wide-blade industrial long handled squeegee. You want the surface damp. Pour the concrete resurfacer product onto the work area surface from a bucket. Using the squeegee, work the product mixture across the surface area scrubbing the mixture into the surface smoothly. Your finished thickness for this application procedure will be approximately 1/16".
If you want a thicker finish, apply another coat over the top of the first coat using all of the same application procedures. This will give you a surface thickness of approximately 1/8". Allow original application to sit for approximately 48 hours before applying the second application. Thin layers is the secret to a long lasting finish with this product.
Temperature Conditions
Do not apply this product at any temperature below 50°F (10°C). In cold weather, use warm water (+/- 120°F or 50°C) to speed setting time. Allow longer curing time prior to use or subsequent applications (lifts). In hot weather work in shaded areas or during the cooler times of the day. Mix using ice water to slow the setting time.
Curing Instructions
Under normal conditions no special curing such as applied compounds, etc. are required. Temperatures should remain above 50°F (10°C) for 8 hours. Protect the surface from freezing for 24 hours. Protect from direct rain for for at least 6 hours. Do not cover unless immediate rain protection is necessary. If temperatures exceed 90°F (32°C), moist cure with fog spray of water for 24-48 hours after application.
Product Quantities Required
For a 24' x 24' garage floor you will need seven (7) 40 pound bags of product for every 1/16" thickness you apply. This product generally sells for under $20.00 per 40 pound bag.
This product has been around for a long time and enjoys an excellent track record year after year as a concrete restoration product or concrete repair product. Your editors have used it for over 25 years to effect concrete repair and concrete resurfacing in the form of overlays to failed floors that have required mud jacking to lift back into place. We highly recommend that you pay close attention to all manufacturers recommendations when using this product, especially their requirements of properly prepping the old surface prior to applying a lift to effect a permanent bond.
❖ Testimonials ❖
We have been following your blog and we have found a lot of useful information in it.
Cecil Sibanda
Product Coordinator
Dorman Products, Inc.
Colmar, PA
I was pleased that I was able to easily find the proper tall storage cabinet for my garage. I needed lockable storage to keep my toddler away from sharp tools and solvents that my husband stores. Garagetips-101 solved my problem!
Renee M.
I love the detail in your garage building pages. They helped me understand how to engineer a foundation for a garage we are planning that our building department will approve. I had the inspector go to your pages and review what I was talking about. Now, I am studying the wall framing sections, as we plan to build it ourselves this fall. Thank you so much for the great information.
R.G.,
Des Moines, IA
Great stuff on wall framing. I never really understood the on-and-off spacing concepts for the wall studs until I read your explanations.
Will,
Grand Island, NE


